I'm in a total funk today realizing it's the last day of July, my favorite month of the year. I'm especially saddened because we always go away in July and this year we couldn't make it happen so I feel cheated out of a summer vacation. We plan on heading to the Rockies for a few days in late August but it isn't the same as heading to the beach for a week or two. Enough about my bad mood, let's get this party started!

Welcome back to Talk of the Town!

Talk of the Town Link Party Every Tuesday at 6 Central, join Knick of Time, Hunt & Host, My Repurposed Life and Interior Frugalista and show off your upcycled DIY projects and yummy recipes!

First, let's take a look at what you may have missed from your party hosts!Talk of the Town Link Party Every Tuesday at 6 Central, join Knick of Time, Hunt & Host, My Repurposed Life and Interior Frugalista and show off your upcycled DIY projects and yummy recipes!
Here's what we're talking about from last week's party!Talk of the Town Link Party Every Tuesday at 6 Central, join Knick of Time, Hunt & Host, My Repurposed Life and Interior Frugalista and show off your upcycled DIY projects and yummy recipes! Tin Can Vases Two Styles Kreative K
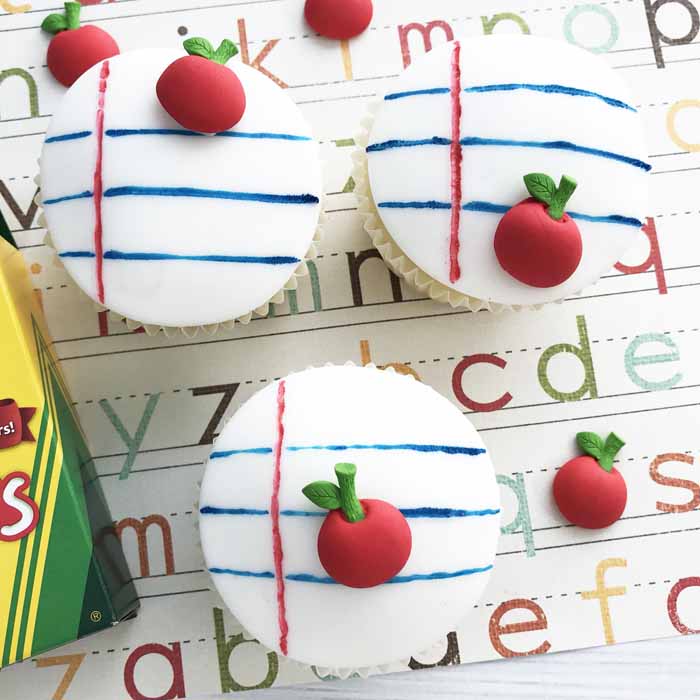
Back to School Cupcakes Country Chic Cottage
Talk of the Town Link Party Every Tuesday at 6 Central, join Knick of Time, Hunt & Host, My Repurposed Life and Interior Frugalista and show off your upcycled DIY projects and yummy recipes! Girl's Beauty Station Dazzle While Frazzled
Snickers Cupcakes Cookie Dough and Oven Mitt

Now, it's your turn!
PLEASE NOTE – There are now *2* separate link ups; 
the first is for DIY/Vintage/Repurposed links and the second for Recipes links.
Thank you!
By linking up at Talk of the Town, you agree that your photos may be used to promote the party, or in other round-ups.
***Please keep in mind that linking up with stock photography or using photos without express permission by the photo owner is not allowed. Links of stock photography or photos that are not owned by you will be removed without notification.***
Talk of the Town Link Party Every Tuesday at 6 Central, join Knick of Time, Hunt & Host, My Repurposed Life and Interior Frugalista and show off your upcycled DIY projects and yummy recipes!

DIY|VINTAGE|REPURPOSED LINKS


RECIPES LINKS


When you want privacy while enjoying your backyard deck but building a pergola isn't an option, here's a budget-friendly way to build a deck privacy screen from repurposed doors. It's simple to build and doesn't require a water wall in the center, although I provide a link to step-by-step instructions for building one. It does make a lovely focal point for the seating area of our deck.

Deck Privacy Screen Repurposed Doors

Deck Privacy Screen From Repurposed Doors


Deck Makeover - Project Nine

Refreshing our outdoor living space on a beer budget!

At long last, the final DIY project of our Budget-Friendly Deck Makeover series. Do you ever have those times when you have a vision for a project, it's moving full speed ahead, and then BAM life gets in the way and it comes to a screeching halt? Well, that pretty much sums up this project that was scheduled to share weeks ago.

I had a vision
created said vision
went to install the vision.

It looked ridiculous
stuck out like a sore thumb
looked like it dropped haphazardly from the sky.

Then it rained
Mr. Frugalista was called out of town
Kitty cats and guinea pigs needed to be fed in the big city
and back to square one with the installation.

What was supposed to be a quick and easy afternoon project turned into a couple of weeks? But it's finished, I love it, and I hope you do too.


This is what the backside of the privacy screen looks like.


So here's how we made the deck privacy screen...


It all started with a couple of heavy 23-inch bifold doors. They used to be in my booth at the antique mall and have been collecting dust in the basement since closing the booth last November. One morning while enjoying my morning java on the deck and feeling annoyed by the lack of privacy, I remembered those two bi-fold doors and the rest is history.


The doors were cut down to 73-inches using a skill saw and cutting guide to the same height as our DIY Water Wall. While I worked on another project, Mr. Frugalista spray stained the doors with Najavo White Behr Premium Exterior Wood Solid Stain, the same stain we used on our Adirondack Chairs, with the HVLP Gravity Feed Spray Gun that came with our 20-gallon compressor.


While enjoying a cold one on the deck between coats of stain a little visitor joined us.


Once the doors were dry we butt them up on both sides of our water wall and attached them on the bottom outer edge of the screen and the deck with 2 1/2 angle brackets, which were pre-painted with Rustoleum spray paint in the color Heirloom White, an almost perfect match to the Najavo stain color.

Deck Privacy Screen Support Bracket

Next, a piece of cedar 1 x 6 x 9 an across the span of both bi-folds and the water wall, secured from the top with 1 1/2-inch wood screws, with a 2-inch overhang on either end.


To add a simple decorative element a narrower cedar 1 x 4 x 8 was attached on top of that. The top trim was stained with Seafoam Green Behr Premium Exterior Wood Solid Stain, the same stain used on our Headboard Garden Bench.

Instructions for building the Water Wall can be found here in my post, DIY Outdoor Water Wall.


To dress up the backside I hung metal basket planters that I've had hanging in my back landing for over two decades. They have an oxidized finish which picks up the green nicely. It's hard to see the patina in the photo below because I took it with my phone.

I haven't decided whether I'll fill them with flowers next year or leave them just the way they are. My concern is they might be too heavy filled with moss and soil. My other concern is with regular watering the white screens will get stained and dirty. Maybe there's another option for them that I haven't thought of.

Deck Privacy Screen Metal Basket Planters |

On the front side of the deck privacy screen hang the DIY Solar Fence Lights and hanging from the water wall is the DIY Birdhouse Sign.


I love how the bi-fold doors create both a lovely feature wall on our deck and give us the privacy we've been longing for.


This isn't our first screen made from bi-fold doors, a few years ago we built a Louvered Door Garden Screen for our backyard to hide our woodpile and other unsightly piles of junk.

I couldn't help but chuckle when I noticed in the photo below that my DIY Whimsical Garden Kitty is peering through the fire bowl screen!


So what do you think of our idea for creating privacy on our backyard deck? Also, if you have any ideas for filling the metal basket planters on the back of the privacy screen, I'd love to hear them.

I've included a materials list below. It contains affiliate links for your convenience so you can see what products I used or recommend to make this project. I may receive a small portion of any sales at no additional cost to you should you make a purchase. See my full disclosure policy.

Supply List

  • Wood Bi-Fold Doors (salvaged)
  • Najavo White (SC-157) Behr Premium Exterior Wood Solid Stain
  • Seafoam Green (SC-132) Behr Premium Exterior Wood Solid Stain
  • Drop Cloth/Tarp
  • Husky 20-Gallon Air Compressor (alternatives)
  • Pneumatic Husky HVLP Gravity Feed Spray Gun (alternatives)
  • Power Drill
  • 1 1/2-inch Wood Screws
  • 2 1/2-inch Angle Brackets x 2
  • 1 Cedar 1 x 6 Board
  • 1 Cedar 1 x 4 Board


Deck Privacy Screen

Deck Makeover Series Recap

Project One - DIY Birdhouse Sign
Project Two - Budget-Friendly Deck Restore
Project Three - Easy DIY Solar Fence Lights
Project Four - How To Stain A Super Easy DIY Outdoor Rug
Project Five - A Quick And Easy Way To Re-Stain Adirondack Chairs
Project Six - A Playful Headboard Garden Bench
Project Seven - How To Add Charm To Boring Outdoor Red Cushions
Project Eight - How To Create Whimsical DIY Garden Decor

Project Nine - Deck Privacy Screen From Repurposed Doors
Project Ten - The Reveal - coming at last!


I share my projects at these fabulous link parties.
With just a bit of elbow grease and very little paint, this well used 5-drawer dresser was redeemed with a whitewash paint finish and geometric dresser makeover. The dresser had been gifted to my family and bounced from one house to another for over three decades. When it landed on my doorstep recently, it was FINALLY given a new life.

Stenciled Geometric Dresser Makeover

Geometric Stenciled Dresser Makeover


Before I get into the details of the makeover, first I'd like to thank the folks at Stencil Revolution for providing the Geometric Wall Stencil for today's makeover. It is one of my favorite days of the month because it's Furniture Fixer Upper Day where I and five talented furniture painting friends come together to breath new life into six pieces of furniture. Links to all the makeovers are included at the bottom of this post.

For last months challenge, I transformed an antique oak bookcase into a Red Painted Cabinet With Farmhouse Charm using fabric from the dollar store.

Whitewashed Geometric Dresser Makeover

This is what the dresser looked like before...

Geometric Dresser Makeover Before

Geometric Dresser Makeover Side View Before

Geometric Dresser Makeover Side View

A few repairs 

From all that moving house-to-house over the last three decades, the dresser was coming unglued at the seams. I don't blame it, I would too 😉

Geometric Dresser Pre-Makeover Repairs

Nothing that a little wood glue and bar clamps can't fix.

A pop of color

While waiting for the glue to cure I added a pop of color on the sides of the stacked drawers with a fresh coat of Annie Sloan Chalk Paint in the color Provence. I had just enough paint leftover in the can to apply three coats. I used this color on the 70's Coffee Table Turned Upholstered Bench and Faux Tin MCM Tables for my son and daughter-in-law's home.

Geometric Dresser Makeover Painted Drawers

Normally I line the drawers with pretty paper but I ran out of time. It's still on my To Do List but first I need to find the perfect wrapping paper, scrapbook paper, or wallpaper.

Geometric Dresser Makeover Painted Drawer Sides

Geometric stencil

Now for the fun part, dressing up this old dresser with a Geometric stencil in a striped diamond pattern. It's much easier to stencil if you place the drawers back into the dresser and lay it flat on the floor. I used Fusion Mineral Paint in the color Raw Silk.

Geometric Dresser Makeover Stencil Supplies

Stenciling Tips

  • Just like when stenciling a wall, it is a good rule of thumb to start the stencil from the top center and work your way down vertically. 
  • Find the center of the dresser and line up the stencil with the center of the stencil pattern. In the photo below the stencil looks offset but it's actually centered with the pattern.
  • Use painter's tape or spray adhesive to hold the stencil in place. I wish I had used adhesive rather than tape as it would have made the job much easier.
  • Load a paper plate with paint and apply the stencil with a 4-inch foam roller.
  • Offload excess paint onto a paper towel first before applying the stencil.
  • Use light to medium pressure on the roller to avoid paint bleed.
  • Wipe any paint that transferred onto the back of the stencil with a damp cloth before moving onto the next stencil.
  • Once you have finished the first vertical row, go back to the top and stencil horizontally from the center outwards.
  • TIP: to avoid having to wait for the paint to dry between stencil applications, alternate from each side of the center stencil. By the time you stenciled one side, the opposite is dry to the touch to apply the next. Hope this makes sense!
  • Continue in this fashion until you've completed the remaining rows.
For tips on how to stencil a wall visit my tutorial 12 Helpful Tips On How to Stencil A Wall.

Geometric Dresser Makeover Stencil Alignment

Geometric Dresser Stencil Progress

Oops!

Here's where I'm going to keep it real friends. It wasn't until writing this post and revisiting Stencil Revolution's website that I realized I stenciled the striped diamond pattern upside down from how they show it stenciled on a wall. I contemplated keeping my oops a secret but decided to come clean so you don't make the same mistake. I think no one would have noticed had I not pointed it out.

While I've applied stencils onto furniture many times, this was my first attempt at doing an all over stencil. I don't claim to be a stencil expert by any means and I learn something new every time. While I have nothing but positive things to say about the quality of this geometric stencil, it would have been helpful if the stencil had directional markings.

Whitewash technique

I was quite pleased how the stencil alone completely transformed this old dresser and considered keeping the rest the original stained wood. The top wasn't in good condition and would have required sanding and I was too lazy for that so I opted for a whitewash distressed finish instead.

Geometric Dresser Makeover Whitewashed

To achieve a whitewash finish, mix a 2:1 ratio of 2 parts paint and 1 part water for a milk-like consistency. Apply paint in the direction of the grain in long brush strokes and wipe with a paper towel also in the direction of the grain. Repeat until you achieve the preferred look - I repeated mine three times.

Distressed finish 

I distressed the whitewash further once it was dry with 220-grit sandpaper.

Geometric Dresser Makeover Whitewashed Top

I also distressed the stenciled drawer fronts for a uniform finish. All the painted surfaces were protected with a coat of clear wax.

Geometric Dresser Distressed Stencil Close Up

Wood refreshed with stain

The stained wood on the front of the dresser and around the drawer fronts was looking rather dull and so I refreshed it with Minwax Wood Finish in the color special walnut. Applying it with a 2-inch foam brush and wiping the excess with a lint-free rag after 5 -10 minutes.

Geometric Dresser Stained Wood Refresh

Dressing it up with knobs

The drawers are a seamless finger pull construction and don't require knobs or pulls. I wanted to add a little jewelry to the front of the stenciled cabinet and so I installed two knobs on the top drawers only. I've had these knobs burning a hole in my pocket hardware stash for a couple of years. I think I got them during my Canadian girl's maiden voyage to Hobby Lobby a few years ago.

Geometric Dresser Makeover Hardware

I used my handy Kreg Cabinet Hardware Jig to align the holes perfectly straight. This is my new favorite tool and I plan on doing a tutorial soon on how to use it.

Geometric Dresser Hardware Installation Jig

The feet were painted more solid white and distressed.

Geometric Dresser Makeover Distressed Painted Feet

I'm thrilled with how a stencil and a little paint completely transformed this dresser. Now it has a new lease on life and can be enjoyed for another thirty years. This time I hope it's loved so much that it doesn't get bounced from home-to-home.

Geometric Dresser Makeover Left Side

Geometric Dresser Makeover Right Side

I'm trying to find a place for it in my home to keep it in the family - shhhh, don't tell Mr. Frugalista.

Geometric Dresser Stenciled and Whitewashed

As promised here is the Materials list for the products used for this geometric dresser makeover. It contains affiliate links for your convenience so you can see what products I used or recommend to make this project. What that means is that if you click on one of the product links and make a purchase, I may receive a small portion of any sales at no additional cost to you. See my full disclosure policy.

Materials List

Items without links can be found at The Interior Frugalista Influencer Shop On Amazon SHOP HERE


Curious minds need to know, did you notice my mistake with the stencil direction before I pointed it out?

Stenciled Whitewashed Geometric Dresser Makeover


Now let's take a look at how my talented friend's in the Furniture Fixer Uppers group transformed these furniture pieces...
Press the links below to see the after photos and tutorials...
  1. Girl In The Garage
  2. Confessions Of A Serial DIYer
  3. Petticoat Junktion
  4. Prodigal Pieces
  5. Just The Woods
  6. The Interior Frugalista (that's me)


I share my projects at these fabulous link parties.