
Sometimes just a wee bit of paint is all a piece of furniture needs to be transformed. Case in point, this beech wood cabinet with a Simmons Juvenile Furniture makers stamp suggests it is for a child's room. But with the two deep drawers and middle cupboard what I saw was a whitewashed media cabinet or white sideboard buffet with farmhouse style.
The light blonde wood in excellent condition is the perfect candidate for a whitewash paint finish. Think of pickling stain but with a lovely matte chalk paint patina. I chose a highly transparent finish with just one coat of paint but it can be as opaque as you like with layers of white paint wash and I show you how easy it is.

We are saddened to announce that our sweet friend, Larissa has left the group to pursue other blogging ventures. She will be missed but this isn't goodbye because we can still catch all her DIY adventures at Prodigal Pieces.
We are pleased to welcome our newest member, the very talented Denise from Salvaged Inspirations. If you are not familiar with her blog, you are going to LOVE her furniture makeovers!
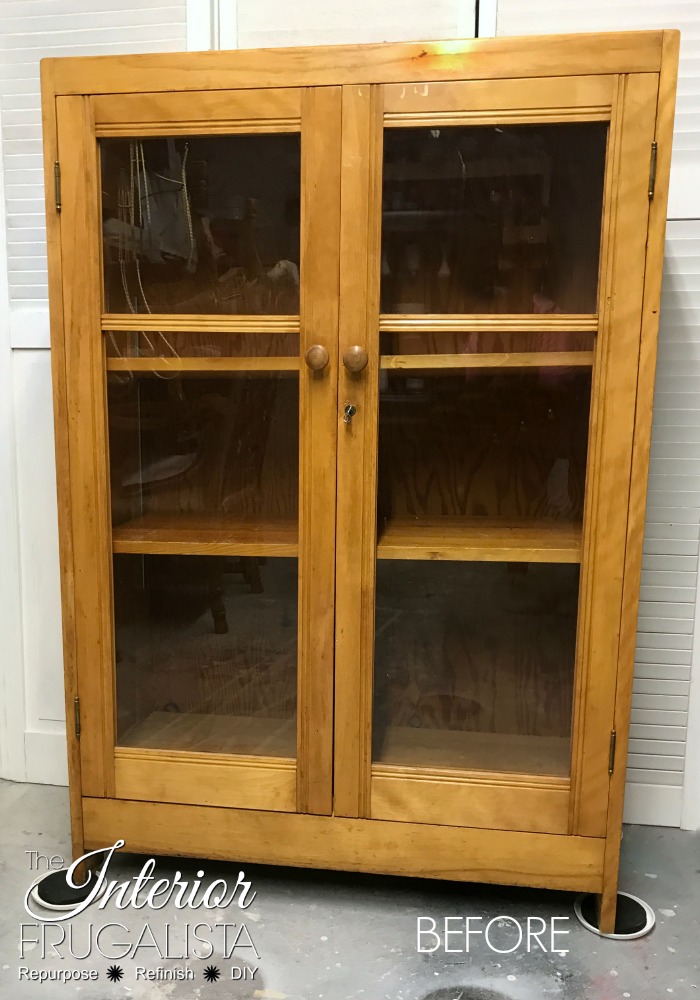
Back to the sideboard buffet makeover. This is what it looked like before...

This post contains affiliate links so you can see what products I used or recommend for this project. At no cost to you, we receive a small commission if you make a purchase.
I had a clear vision for this makeover going in. Paint the cabinet pure white with heavy distressing, stain the top a medium brown, add these awesome Farmhouse decor transfers on the knobs and part of this furniture transfer to the front of the cabinet door. Sadly, they couldn't be shipped on time so onto plan B.

I added a surprise pop of color to the interior by painting the cupboard Upper Canada green. I used a mineral chalk paint which has a built-in sealer so no clear coat is required and it'll cure rock hard within 21 days.

Part of plan B was to add pretty handpainted floral knobs to the top drawers that picked up the green of the painted interior. I decided not to use them because they took away from the simple farmhouse charm. Instead, I kept the original wood knobs and painted them white and distressed to match the whitewash finish.

Unfortunately, the beech veneer top was a lot worse for wear and couldn't be stained. There was some uneven coloring in the veneer so I couldn't give it a transparent whitewash like the rest of the cabinet either.
Onto plan C, an opaque whitewash with four coats of paint and distress the heck out of it with a mouse sander.

I added Farmhouse typography onto the top but instead of a furniture transfer, I went all old school. More about that further down in the post.

Here's a close up of what the transparent whitewash looks like on the lower cabinet and the opaque whitewash on the top.

Part of the deciding factor for giving this piece a farmhouse style makeover was the skirt. Even though I believe it would be considered a craftsman or mission style base to me it had farmhouse potential.

The chicken wire frame sitting on top of the farmhouse sideboard is another DIY project. You can see how I made it here in my repurposed window message board post.
The little girl holding a chicken was painted by my Mom several years ago and is one of my cherished possessions. She was a landscape artist and rarely painted portraits so this is one of just a few.

You can apply it with a lint-free rag (old t-shirt) or brush it on like I did. Wipe the excess with a lint-free rag before the paint dries. For larger pieces, work in sections. In spots where I got more paint, I used a fine mist spray bottle and just moved the paint with the brush to thin it out.
Like I mentioned earlier in the post, I only applied one coat of whitewash but on the top, I applied four coats.

The light blonde wood in excellent condition is the perfect candidate for a whitewash paint finish. Think of pickling stain but with a lovely matte chalk paint patina. I chose a highly transparent finish with just one coat of paint but it can be as opaque as you like with layers of white paint wash and I show you how easy it is.
White Sideboard Buffet With Farmhouse Style
It is Furniture Fixer Upper Day where six talented furniture painting friends come together once a month to breath new life into a piece of furniture. You can find links to the other makeovers at the bottom of this post. Last month I shared a tutorial on how to paint Arborite with my Retro Dining Table Makeover.
We are saddened to announce that our sweet friend, Larissa has left the group to pursue other blogging ventures. She will be missed but this isn't goodbye because we can still catch all her DIY adventures at Prodigal Pieces.
We are pleased to welcome our newest member, the very talented Denise from Salvaged Inspirations. If you are not familiar with her blog, you are going to LOVE her furniture makeovers!
Back to the sideboard buffet makeover. This is what it looked like before...
This post contains affiliate links so you can see what products I used or recommend for this project. At no cost to you, we receive a small commission if you make a purchase.
I had a clear vision for this makeover going in. Paint the cabinet pure white with heavy distressing, stain the top a medium brown, add these awesome Farmhouse decor transfers on the knobs and part of this furniture transfer to the front of the cabinet door. Sadly, they couldn't be shipped on time so onto plan B.
I added a surprise pop of color to the interior by painting the cupboard Upper Canada green. I used a mineral chalk paint which has a built-in sealer so no clear coat is required and it'll cure rock hard within 21 days.
Part of plan B was to add pretty handpainted floral knobs to the top drawers that picked up the green of the painted interior. I decided not to use them because they took away from the simple farmhouse charm. Instead, I kept the original wood knobs and painted them white and distressed to match the whitewash finish.
Unfortunately, the beech veneer top was a lot worse for wear and couldn't be stained. There was some uneven coloring in the veneer so I couldn't give it a transparent whitewash like the rest of the cabinet either.
Onto plan C, an opaque whitewash with four coats of paint and distress the heck out of it with a mouse sander.
I added Farmhouse typography onto the top but instead of a furniture transfer, I went all old school. More about that further down in the post.
Here's a close up of what the transparent whitewash looks like on the lower cabinet and the opaque whitewash on the top.
Part of the deciding factor for giving this piece a farmhouse style makeover was the skirt. Even though I believe it would be considered a craftsman or mission style base to me it had farmhouse potential.
The chicken wire frame sitting on top of the farmhouse sideboard is another DIY project. You can see how I made it here in my repurposed window message board post.
The little girl holding a chicken was painted by my Mom several years ago and is one of my cherished possessions. She was a landscape artist and rarely painted portraits so this is one of just a few.
Here's how I did it...
Prep the cabinet for paint
I've said it before and I'll say it again, this is the most dreaded step (at least for me) when doing furniture makeovers BUT it is one of the most important for a long-lasting paint finish. You'll find many helpful tips in my How To Prep Furniture For Chalk Paint A-Z tutorial.How to whitewash with paint
I used Annie Sloan Chalk Paint in the color Old White that I had on hand. When doing a paint wash the more water to paint, the lighter the wash. Typically a 1:1 ratio is used but I thinned mine to the consistency of milk. Sorry, I didn't measure but probably closer to a 2:1 ratio.You can apply it with a lint-free rag (old t-shirt) or brush it on like I did. Wipe the excess with a lint-free rag before the paint dries. For larger pieces, work in sections. In spots where I got more paint, I used a fine mist spray bottle and just moved the paint with the brush to thin it out.
Like I mentioned earlier in the post, I only applied one coat of whitewash but on the top, I applied four coats.
Distressed farmhouse finish
After the paint dried I distressed along the edges and around the drawer fronts with 150 grit sandpaper where it would normally age over time. I also gave the area around the knobs a worn finish. On the top, I went crazy with a mouse sander, especially along the edges and corners.
Stencil and graphic add more farmhouse charm
Saddened I couldn't get the farmhouse furniture transfer on time but determined I would add farmhouse typography to the top, first I used this grain sack stripe stencil (not an affiliate link) with pewter grey chalk paint to stencil down the middle of the buffet top.

Next, I found this Huge Sign Making Bundle with 40 different design sets on Etsy (not an affiliate link) and printed the Welcome To Our Farmhouse graphic in png format and set to print on legal size bond paper. Instead of including step-by-step instructions on how I applied it to the sideboard, you can find a detailed tutorial in my Graphite Paper Image Transfer Technique post.
Painted with a script liner art brush and Hurricane dark grey chalk paint. Once the paint dried I distressed both the grain sack stripe and graphics with 220 grit sandpaper for a timeworn appearance.

Protect the paint with wax and clear coat
The cabinet base and drawer fronts are protected with white wax applied with a wax brush and buffed with my go-to car detailing wool buffing pad (any of these would work). Mine is meant to be used with a drill but I hand buff instead.

For added protection on the top, I used a water-repellent clear coat tinted white, thanks to a genius tip I learned from Kandice Just The Woods, my fellow Furniture Fixer Upper friend.

After giving the jar a good shake, I poured some Gator Hide onto a paper plate and mixed about 1/2 teaspoon of whitewash glaze.
Applied with a damp car detailing foam applicator pad (any of these would work) in long even strokes. I applied two coats with a 2-hour dry time between coats.
So what do you think? Would you whitewash wood furniture or is a solid paint color more to your liking?
If you have any questions about this makeover, please leave them in the comment section below or press the Contact Me button at the top of the blog to drop me an email. I love hearing from you!


Please join me to take a look at how my talented friend's transformed these furniture pieces. Press the links below to see the after photos and tutorials.
- Girl In The Garage
- Confessions Of A Serial DIYer
- Petticoat Junktion
- Just The Woods
- Salvaged Inspirations
- The Interior Frugalista (that's me)
I share my projects at these inspiring link parties.
Stencil and graphic add more farmhouse charm
Saddened I couldn't get the farmhouse furniture transfer on time but determined I would add farmhouse typography to the top, first I used this grain sack stripe stencil (not an affiliate link) with pewter grey chalk paint to stencil down the middle of the buffet top.Next, I found this Huge Sign Making Bundle with 40 different design sets on Etsy (not an affiliate link) and printed the Welcome To Our Farmhouse graphic in png format and set to print on legal size bond paper. Instead of including step-by-step instructions on how I applied it to the sideboard, you can find a detailed tutorial in my Graphite Paper Image Transfer Technique post.
Painted with a script liner art brush and Hurricane dark grey chalk paint. Once the paint dried I distressed both the grain sack stripe and graphics with 220 grit sandpaper for a timeworn appearance.
Protect the paint with wax and clear coat
The cabinet base and drawer fronts are protected with white wax applied with a wax brush and buffed with my go-to car detailing wool buffing pad (any of these would work). Mine is meant to be used with a drill but I hand buff instead.For added protection on the top, I used a water-repellent clear coat tinted white, thanks to a genius tip I learned from Kandice Just The Woods, my fellow Furniture Fixer Upper friend.
After giving the jar a good shake, I poured some Gator Hide onto a paper plate and mixed about 1/2 teaspoon of whitewash glaze.
Applied with a damp car detailing foam applicator pad (any of these would work) in long even strokes. I applied two coats with a 2-hour dry time between coats.
So what do you think? Would you whitewash wood furniture or is a solid paint color more to your liking?
If you have any questions about this makeover, please leave them in the comment section below or press the Contact Me button at the top of the blog to drop me an email. I love hearing from you!
Please join me to take a look at how my talented friend's transformed these furniture pieces. Press the links below to see the after photos and tutorials.
- Girl In The Garage
- Confessions Of A Serial DIYer
- Petticoat Junktion
- Just The Woods
- Salvaged Inspirations
- The Interior Frugalista (that's me)
I share my projects at these inspiring link parties.




 (around the glass)
 (for clear and dark wax)
 (for buffing wax)
 Matte
Matte


